I’ve been painting semi professionally for about eighteen months now. I can use water-based, or solvent-based paints, but tend towards water-based, (be it paints or pens), for the majority of the work. Lacquers are either acrylic 1K, (DIY car spares shop type aerosols), or Solvent 2K clears.
I promised I’d write a “how to” on painting my latest helmet project, so here goes.
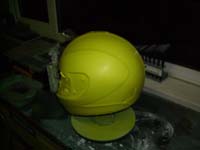
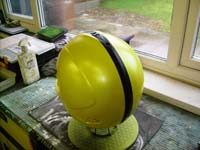
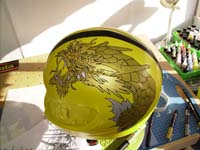
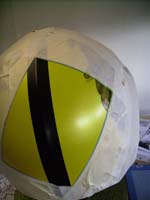
It started out life like this:

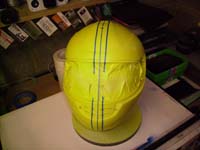
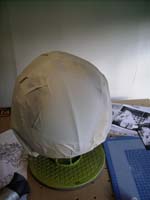
After removing all the fittings, visor, vents, trim etc it was scuffed all over with a red “Scotchbrite” pad until it was completely matt. I then de-greased it with white spirit, masked off the edges, visor opening, and behind all the vents and gave it three coats of white primer. After a night in the airing cupboard, (as it's a touch chilly in the garage), this was then scuffed with a grey Scotchbrite pad and given three coats of Signal Yellow.
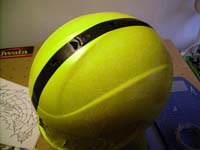
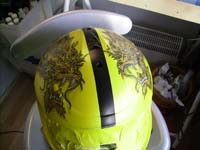
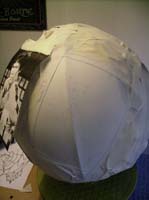
Once this had dried, I then masked out the centre line with 2mm blue fine line tape and laid out 3mm blue fine line tape as the edge of the centre stripe.

The rest was then masked off using masking tape and plain drawing paper.
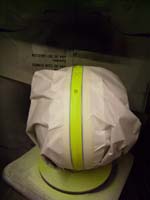
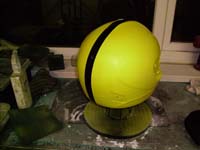
Then two coats of black and remove the masking tape before the paint has 'set', to avoid hard lines where the masking tape was.
Time for a brew or two!
For small jobs like helmets, spray cans actually work really well. It's just when you have a large area to cover, you end up with uneven coverage. That’s when the spray gun comes into play!
At this point I decided it needed some ..bling! So out came the airbrush and it got a dusting or two of acrylic pearl ink. Never tried this stuff before, but wow, I'm impressed! It’ll look awesome once it’s clear coated! A coat of Medea Top Coat, (a kind of clear varnish that'll protect this stuff should I mess up later on down the line!), and back into the airing cupboard.
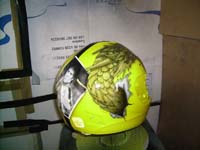
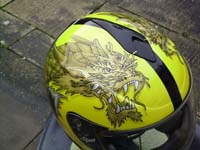
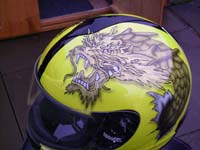
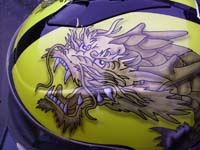
Having laid on the base colour & sealed it, it was time to start on the graphics. First, the design for my dragons was laid out using a photocopy of the picture and some “Tracedown” underneath, (it's a kind of carbon paper that comes in various colours, but wipes off).
None of my metallic paints would give me the level of detail I wanted, so I decided to use my Posca Paint pens to lay the design down with. I’m also kind of painting it in reverse so it'll look crap at the start, but, (hopefully!), get better as I go along. The pens also give the dragons’ bodies a little bit of 'texture'. I'll eventually line them with black to give a 'tattoo-y' feel, then add the detail with transparent black afterwards.
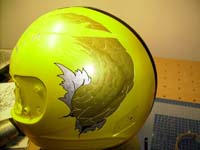
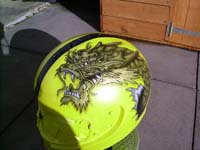
Finished off laying the gold of the dragon.

After that, using a fine Posca marker, I added in all the black 'tattoo' lines.
And finally broke out the airbrush! Using transparent black, I've shaded the dragon to give a bit of depth and given the metal 'tears' a look of folding. Highlights followed, using a reduced white and finally some 'shadows' with the trans black again. A layer of top coat to protect it, and then...start all over again on the other side!
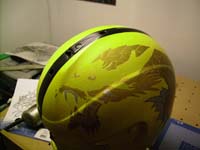
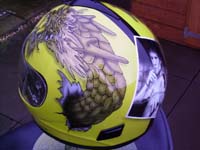
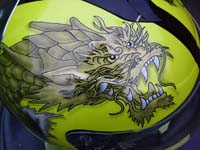
Finally found some time to get the other side of the helmet done.
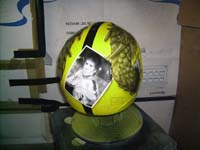
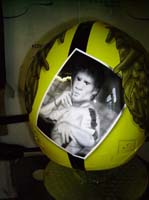
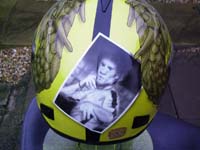
Then once that was treated to a coat of 'top coat', I decided whereabouts the portrait work was going to go…
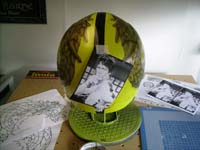
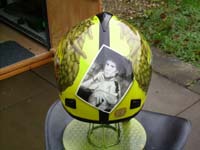
and masked off a rectangle, (that isn't actually rectangular because of the helmet curves), then using liquid latex, masked off the part of the dragon that'll end up on top of the picture. This protects the artwork below, and then just peels off afterwards -great for intricate designs on curved surfaces.
Finally I turned the whole square white with Etac Titanium white paint.
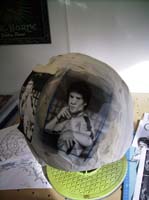
On the white area, I lightly sketched the main areas of the picture.
Then, with “Transparent Smoke”, added in the background details, not worrying too much about tight lines as it's out of focus on the original pic anyhow. The eyes were just boredom kicking in!
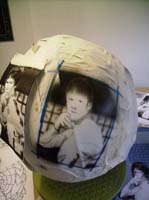
Once I was happy with the background, I masked that off using 'Ultramask', a kind of clear low tack fablon, and started on the detail. Tight detail is really hard at this small scale, so some compromises were made.
Once it's un-masked and the latex covering the overlap removed, I added a gentle drop shadow underneath the picture.
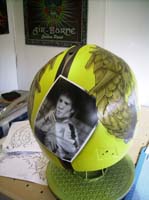
I also added my new logo.
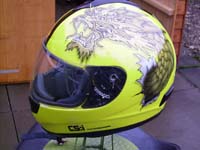
The first layer of clearcoat. This isn't smooth, but the next few after sanding and clearcoat will improve that.
It does start to show up the pearl yellow nicely though!!
That's it for at least two days now as the clear needs to harden nicely.

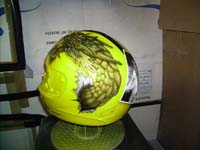
The clearcoat used on this has taken forever to harden, but was well worth the wait. It looks awesome! It's just been sanded back with 3200 micromesh and is back in the airing cupboard to dry and to allow any solvents left that were re-activated with the sanding to evaporate. And this is the end result. Whad’ya think?
-Clive.
Clive works under the name “Airborne Custom Paint”, handling everything from vehicles to guitars to surfboards & can be found here:
http://www.airbornecustompaint.co.uk/
If you fancy commissioning him, be sure to tell him MMMotors sent you!