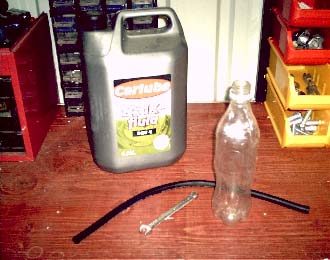
To bleed your brakes you will need:
- A new bottle of the recommended brake fluid, (dot 4 will suit most)
- A length of rubber hose that fits tightly over the brake bleed nipple and will reach the floor.
- A spanner to undo the brake bleed nipples.
- And a clean jar or plastic bottle to collect the old brake fluid in.
Bleeding the brakes:
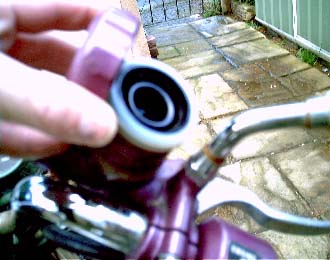
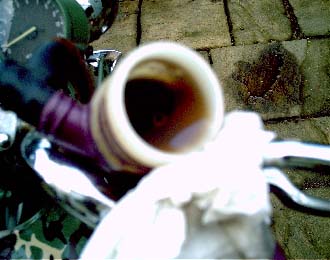
Remove the reservoir cap and take out the rubber diaphragm that is normally fitted inside. Top up the reservoir to the maximum level and refit the diaphragm and the cap.
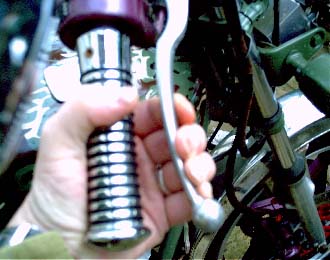
Remove the rubber dust cap from the bleed nipple on the brake caliper or wheel cylinder and squeeze the hose onto the nipple.
Pour between one and two inches of brake fluid into your jar and drop the end of the hose into it. This will prevent any air being sucked up into the brake system when the bleed nipple is opened.
If it’s the rear brakes that you’re doing, release the handbrake lever, assuming you use it!
You’ll then need to either squeeze the brake lever or depress the brake pedal hard, (depending on whether you’re doing the front or the back), and whilst maintaining the pressure, open the bleed nipple half a turn.
As the lever or pedal completes it’s travel a small amount of fluid will be released into the jar and you should see air bubbles escaping from the bottom of the hose.
The bleed nipple must then be tightened just as the lever or pedal reaches its stop.
When the bleed nipple is tight the lever or pedal can be released again back to it’s normal position.
Repeat this process -applying pressure, opening the bleed nipple, letting the lever/pedal complete its travel, tightening the bleed nipple, and releasing the lever/pedal.
This will be repeated about four or five times before you’ll have to remove the reservoir cap and diaphragm and refill the reservoir with the new brake fluid.
Do not let the reservoir run dry of brake fluid.
This process must be repeated until brake fluid being spent into the jar is free of any air bubbles. You should notice a firmer feel to the lever/pedal when the bleed nipple is tightened.
When this has been achieved the bleed nipple must be tightened down properly.
Remove the hose from the bleed nipple and replace the rubber dust cap.
You have to repeat this procedure for each caliper or wheel cylinder so if you’re doing the front you’ll have to bleed the calipers on either side of the forks and obviously each wheel cylinder per axle side.
Re-check the brake reservoir and top up if necessary -making sure not to overfill as when you come to replace the diaphragm and cap it might overflow -and brake fluid will eat it’s way through your paintwork very, very quickly.
You’ve now finished bleeding your brakes.
Changing the brake fluid:
brake fluid is hygroscopic -it absorbs moisture. This moisture can permeate through the brake hoses and contaminate the brake fluid.
The water in the system will then heat up under braking and can form vapour locks which in turn will destroy the effectiveness of the brakes.
So changing the brake fluid at regular intervals will prevent this happening.
It‘s the same process as bleeding the brakes, except that you open the bleed nipple and operate the brake lever/pedal to pump out the old brake fluid.
A small amount will be left behind but not enough to make a difference.
Top up the reservoir with new clean brake fluid and continue to operate the brake lever/pedal until you see the new clean brake fluid coming out of the hose.
This should have flushed out the last of the old brake fluid.
Close the bleed nipple and then bleed the system as described above.
-Tbone