 |
I bought a frame with title, engine, hubs/wheels and forks.
I started cutting away the rear frame, mostly the top section.
I stretched the original swing-arm by an inch -this way the upper tubing of the hardtail section follows the upper frame tube nicely.
With the extended swing-arm in place I determined the ride height. I did that with the original fork legs, just dropped through the yokes.
When this was okay I started bending tubing for the upper hardtail section. After that the lower tubing was bent and tack welded in place.
When the tubing was about done I cut away the remains of the frame, including the pivot point of the swing-arm.
This way I ensured everything remained straight.
I used the original rear axle mounting plates, cutting them out of the original swing-arm. I just liked the cast steel pieces.
Connection of the lower hardtail tubing in the original tubing was done with hollow slugs, fitting them inside the old and new tubing, sturdy, precise and the only way.
I used the yokes and thicker fork legs from an XS 750 Yamaha, cut a few inches off the top and remade the grooves for fitting the fork-stops. Internally, I adjusted the damper hole-size to get better suspension. Combined with thicker fork oil, the front end is now perfect.
Used some late model Suzuki handle bar mounting thingies, which hold the 1 inch handlebars, fitted with an internal throttle. I only have the lever for the front brake on the handlebars for better looks.
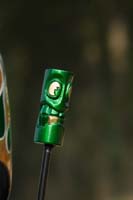
Shifting is done by hand, with the long handle connected to the original gearlever. It holds the green Tiki head gear knob.
Clutching is done by left foot, I kept the cable operated system, just connected the cable to the foot lever.
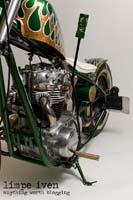
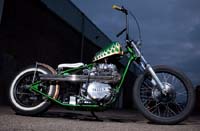
I wanted stainless steel exhausts, (in the time I was building I couldn’t use a TIG welder, so had to let someone else do that for me. The welds really suck).
What I wanted was to run the headers inside the line of the frame. They told me it couldn’t be done. I did it, taking pieces of bend tubing and my brain working overtime, I managed to make me a set of headers which run inside the frame line, and more importantly can be fitted or removed without taking the engine out of the frame.
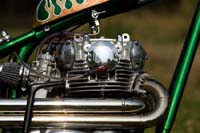
The engine is stock. I modified the ignition and it now runs on 1 coil with double output, (2 spark-plug-wires). I also modified the alternator as I didn’t want to use a battery.
The system is capable of running without a battery but I fitted one just to be on the safe side. I have to modify the ignition set-up so it really can run without battery. It’s the starting that is a pain without battery, with the kick-starter you can’t generate enough power to get a decent spark.
I run 2 Mikuni VM34 carbs, but still have to find some cool air-cleaners.
Included an externally mounted oil-filter to have some extra oil, (besides that, the stock filter is really tiny and I just don’t trust the filtering capacity).
Tried to hide away the wiring as much as possible. It’s not a lot, just really simple, the switches are hidden in the fake oil tank which I made out of an old fire-extinguisher. I had a friend machine a piece of bronze and a bronze cap to fit it. I can put some small stuff in there, (you know- condoms, pain-killers and a toothbrush, and a screwdriver and a hammer -never leave home without it!).
Used an LED lamp in the rear. A regular bulb will not have a long life on a hardtail. They actually come in duplo set ups, 5/15 watts. Nice !
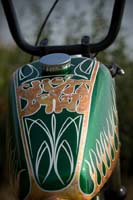
Tank is an HD Sportster model. I got the seat from a friend.
The rear fender is made out of an HD Electra Glide front fender. I narrowed it and cut it to my likings.
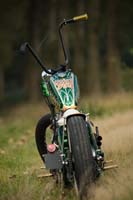
Front wheel hub is from an XS model, (don’t know what year), which has a 2 leading shoe set-up -it stops okay. I found a 21 inch rim with the right amount of holes for the drum and had the rims powder-coated. The rear rim is a 16 inch which holds an old style Shinko white wall. Up front there’s the famous Avon Speedmaster.
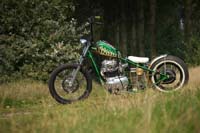
The bike handles perfect. It corners very nice. You can ride without holding the handlebars, (just for testing purposes –honest!). Gear changing takes some time to get used to. The engine runs flawlessly, nice sound out of the stainless steel long pipes. It’s got enough power to make nice trips down the dirty back roads. I really avoid freeways -being a Japanese twin it revs kinda high when on the freeway. I don’t like that. Besides, when riding, I’m not in a hurry. 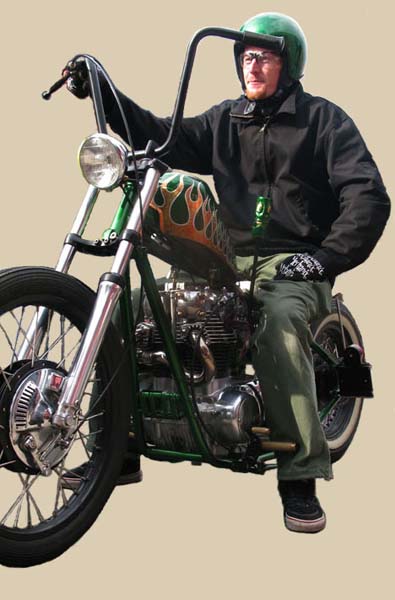
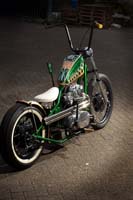
Paint is done by my friend who owns a body shop. He applied the metalflake green, all with House of Kolor products. Got a helmet in the same colour.
After assembly and testing the whole bike moved to Antwerp, where my friend El Cheapo, http://eckw.blogspot.com/ applied the gold leafing, lettering and pinstriping.
Still to do:
making smaller handlebars, (I changed jobs and do a lot of stainless steel TIG welding now), narrower and not so high. Moving the rear wheel a small amount to the centre, (during assembly I lost some specially made spacers). Reposition the seat -I slip off it when hitting the throttle, and modify the ignition set-up so I can run it without the battery.
I didn’t follow any style or trend. It’s not old skool, it’s definitely not a bobber, I just followed my own ideas. I built it to what I like and what was possible without encountering a load of problems.
It turned out nice. |